|
Get Free Moving Quotes
|
|
How to Make Your Own Cell Box for Packing Glassware |
|
Rating : 5.0/5
based on 1 visitor(s) 1,665 Views
|
|
|
|
|
|
Moving is a rather expensive project from beginning to end. To help lighten your moving budget -- and in turn your wallet -- consider saving money where you can.
This can include finding and making free packing materials, such as cell boxes for properly packing and moving the glassware you have around your home. It's the best way to protect your fragile items from damage.
Supplies 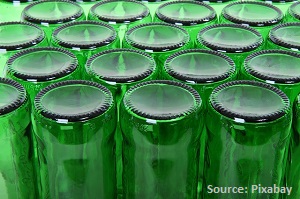 In order to make and pack your cell box, you will need to have a few supplies on hand. Make sure you have: In order to make and pack your cell box, you will need to have a few supplies on hand. Make sure you have:
- A moving box for packing
- An additional cardboard box to make the individual cells
- Sturdy scissors or a box cutter
- A pen or pencil
- A permanent marker
- Measuring tape
- Packing paper
- Packing tape
Constructing the cell box Now comes the fun part, making the pieces for and putting together your cell box.- Measure the moving box. Take note of the length, width and depth of the box you will be placing your cell box inside.
- Break down the extra box. To get the pieces you will need for your cell box, break down a sturdy box. For best results, use sturdy pieces of roughly even thickness.
- Cut up the cell box pieces. Using the measurements you took in the beginning, cut two pieces of cardboard the length and depth of the box and three (or more pieces) using the width of the box and slightly more than half of the depth.
- Place your glassware. To determine how to put your cell box together, place one row of the glassware you will be packing against the length of the box and place the short pieces of cardboard in between the glasses to serve as dividers/make up the base of your cell.
- Make your notches. On top of these shorter pieces, place a longer piece of cardboard and mark where they intersect with a writing implement. Cut long notches where you made these marks, taking care not to cut all the way through to the other side.
- Repeat Step 5 with all your long cardboard pieces.
- Assemble the cell box. Fit the notches you made on the longer cardboard pieces onto the shorter cardboard pieces to make a grid that your glassware can sit in. Adjust your grid if needed to get the best possible fit for your glasses.
Packing your glassware Once your cell box has been constructed, you can pack it full of glassware.
- Pack the inside of the glass. To prevent breakage in transit, pack the inside of the glasses you will be moving full of packing paper.
- Wrap them up. Next, wrap the outer layer in several pieces of packing paper, being sure to tuck the extra paper into the rim of the glass.
- Place them. Glasses should be loaded into your cell box with the rim side facing downward.
- Fill in empty spaces. To stop the glasses from jostling during your move, cover any empty space between the top of your glass or the cell box and the lid of the box with crumpled packing paper.
- Seal and label. Finally, seal the box securely with packing tape. Note on several sides of the box with a permanent marker that the items inside are fragile and which side of the box to keep facing up when being carried and loaded during the move. Also make sure to note what is inside the moving box and what room it should be moved to in your new home.
Hire movers If this seems like too much work, you can always buy cell boxes, or hire a moving company who will come equipped with their own cell boxes. To hire professional movers, all you have to do is fill out this fast and easy quote form to begin receiving estimates from moving companies in your area. They'll do all the hard work for you. Promise. |
|
 |
Author : Cassandra Rose
on September 5, 2014
TopMoving.ca - Moving Expert
|
| |