Renters will often shell out a lot of cash on a security deposit when they first move in, and cross their fingers they will get it back come move out day. But what is a security deposit exactly? And what does it cover?
A security deposit (also known as a damage deposit) is collected by a landlord from the tenant(s) in order to ensure that they stick to certain guidelines while living on the property. For example, not destroying everything on the property or refusing to pay their rent on time.
Assuming that you stick to these recommendations and your money is refundable, you will most likely be on your way to getting your security deposit back after the termination of your lease.
 Security deposits from province to province Security deposits from province to province
At the beginning of your lease, you most likely paid a security or damage deposit to your landlord, the price of which was dependent on which province or territory you live in.
Security deposits can range anywhere from half a month to a full month's rent, may or may not be refundable, and can be used for unpaid rent, damage, etc. all of which is determined by the laws of your province.
Regardless of the location however, you and your landlord need both be aware of:
- The total amount of the security deposit (which cannot exceed one month's rent)
- Whether the security deposit is refundable or non-refundable (pet fees are occasionally not)
- Why a deposit is being collected and what it can be used for (back rent owed, last month's rent, a late rent fee, etc.)
- Where the deposit will be held (in a bank to gain interest, the Office of the Rentalsman, etc.)
TIP: Having trouble regaining your damage deposit or have any further questions? The site LawNow is full of useful information about renting in Canada and the inner-working of damage deposits. Proper steps to take
To get your security deposit back successfully, there are several steps you must take before and after moving day for a fond departure.
- Give your landlord the proper amount of time between ending your lease and your leaving date (this is generally around 60 days to a month)
- Ask what is expected of you
- Clean and clean thoroughly (see more about the cleaning process below)
- Be there when your landlord does the moving out inspection, this way you can fix or re-clean any problems
- Pass along your forwarding address just in case
Rooms to take care of
Once you have successfully moved everything out of your apartment, it is time to get the cleaning process underway.
Pay extra careful attention and clean all the rooms and the things in them (including the hallways) and focus on the following:
- Living room - floors, walls, ceiling, light fixtures, light switches, outlets
- Dining room - floors, walls, ceiling, light fixtures, light switches, outlets
- Bathroom(s) - sink, cabinets, counters, pipes, toilet, bathtub and/or shower, floors, walls, ceiling, light fixtures, light switches, outlets, doors
- Kitchen - sink, cabinets, counters, pipes, refrigerator, microwave, stove, floors, walls, ceiling, light fixtures, light switches, outlets
- Bedroom(s) - floors, walls, ceiling, light fixtures, light switches, outlets, doors
- Any other rooms in your apartment as well as the door leading into said apartment
Items to focus your cleaning/repairs on:
- Hardwood floors, tile floors and carpets
- Sweep and mop hardwood floors and tiles
- Vacuum the carpet
- When necessary, steam clean the carpets and take care of any stains with stain remover
- Remove scuffs off the floor
- Walls
- Fill in any holes you may have put in the walls while hanging picture frames and posters
- Check that all the baseboards are firmly in place
- Don't forget to thoroughly scrub the tile walls in your shower
- Clean particularly dirty walls (such as in the kitchen)
- Ceilings
- Fix any cracks or leaks you caused
- Check that smoke detectors and/or carbon monoxide detectors are in working order
- Light fixtures and outlets
- Do a once over to see that all the light fixtures and outlets still work
- If you removed any light switch or outlet faceplates, replace them
- Confirm that the AC, heating units and thermostats work
- Windows
- Replace any damaged or broken blinds
- Dust and/or wash any old blinds
- Fix any cracked windows
- Clean inside and outside the windowsills as they have a tendency to collect dirt
- Wash the inside and outside window glass
- Doors
- Clean all doors to remove scuffing
- Check that the locks still work
- Appliances/utilities
- Clean all appliances and household fixtures
- Pay careful attention to detail while cleaning the refrigerator, stove, toilet(s) and shower/bathtub(s)
- Make sure that nothing is leaking, particularly the fridge and any pipes
TIP: In addition to cleaning, don't leave anything behind that your landlord will be forced to remove for you. This is a definite way to have money taken off your deposit.
Fill out an inspection sheet
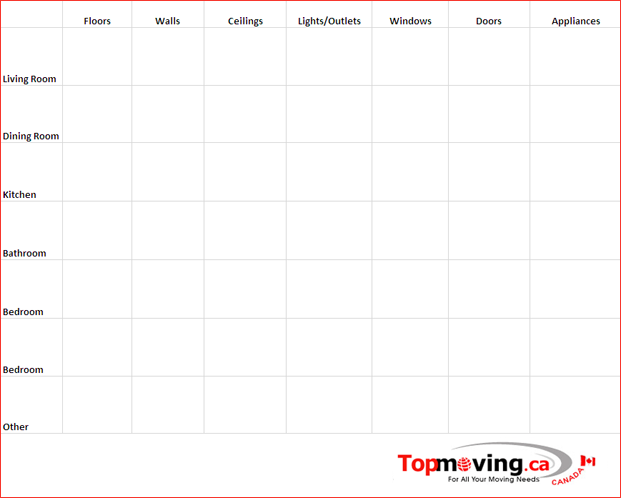
As you did right before you moved in, go through your apartment after moving and post-cleaning and complete another inspection sheet checklist.
Your landlord may either give you one (as before) or you may have to make one of your own. You can also download the one we have provided below (or you can download a PDF version of it):

Compare your new checklist and your original one to confirm that everything in your apartment is in as good condition or better condition than when you moved in. This way, when your landlord performs his/her own inspection - which you should be on hand for - nothing will come as a surprise.
The fate of your deposit
Depending on if you left your apartment in acceptable condition or not will determine how much of your security deposit you will get back from your landlord.
Generally, you will not be charged for regular wear and tear, but if something major requires fixing this will most likely come out of your deposit.
Thankfully, if you took care of your rental property and treated it well (as you should) there ought to be no problems.
|